Tampilkan postingan dengan label chocolate. Tampilkan semua postingan

Senin, 31 Desember 2012

Top Creative Fun Food Posts of 2012!

With today being the last day of 2012 I decided to do a round up of the 
top 10 Creative Fun Food posts of 2012!

2012 is almost over! Is it me or did this year fly by? I don't know about you but I am ready for 2013. Ready for a new year, a new beginning, a fresh start. There is something so wonderful about a clean slate. I hope and pray that 2013 is a wonderful year!

Here are the top 10 most viewed posts of 2012: 
(click on the link or picture to see more detail)


We made these cute Baby Chick Chocolates out of leftover M&M's from Eliana's birthday party. They were such a hit and so easy to make! And they are Sooo cute! No wonder they were one of the most viewed post of 2012! :)

We made this super simple jello dessert recipe for St. Patrick's Day! Vanilla Bean Ice Cream Jello cut into Shamrock shapes! The ice cream floats to the top and makes a separate layer.

Eliana wanted a rainbow birthday party for her 4th birthday.  Like I mention in the post there are millions of rainbow party ideas out there but what I wanted was simple. No printouts. No labels. No incredible amounts of candy. And most of all I did not want it to be super expensive.  It was the perfect party! We had only family and a few close friends.  My friend Kristen of Pixelated Crumb made Eliana's birthday cake! It was GORGEOUS! :) Her husband Joseph took this amazing picture of our display table :)

Eliana loves Angry Birds (and is better at the game than me...) so I made a simple lunch based loosely on the Spring version of Angry Birds Seasons for her. It was made complete with a pretzel rod slingshot :)
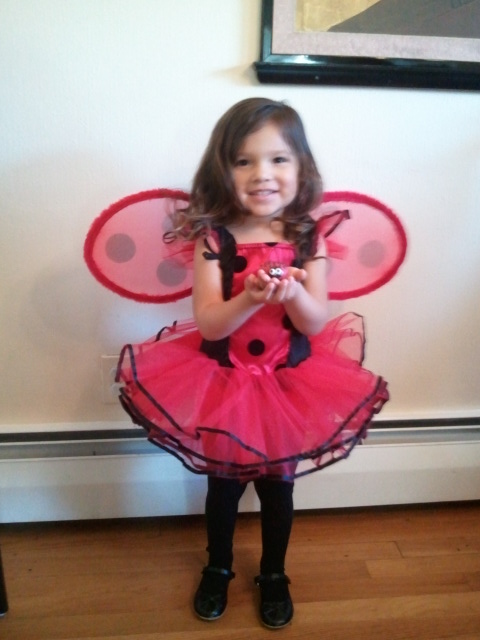
We made some ladybug pancakes and then I reminisce and share pictures from Eliana's 3rd birthday party (which was ladybug themed!) You'll find lots of cute ladybug ideas in that post! :)

This is probably my favorite lunch of the year.  It wasn't the easiest lunch I've ever made but the look on Eliana's face was priceless and worth all the trouble!  It also taught me the importance of planning your creative lunch ahead of time instead of making it up on the spot :)

The spiderweb made with pretzel sticks and vanilla candy melts (or white chocolate) sits ontop of a full sandwich. You can easily make the spiderweb beforehand to save time :)

Eliana had requested a Very Hungry Caterpillar lunch after refinding her book so we made a simple snack and a bento lunch! I used a straw to make holes in the strawberries because on Thursday the Very Hungry Caterpillar ate through 4 strawberries :)

When I stumbled over this recipe I knew it was going to be a hit with our family! This is a family favorite recipe now and it is seriously the simplest snack to make!

I graduated this year!!!! and I made some Chocolate Graduation Caps for ME :) (if I ever make some again I'd use suncups (peanut/nut-free) so Eliana could eat them! When I made these Chocolate Graduation Caps we were unaware of her allergy, we just knew she didn't like peanut butter and wouldn't eat it)

Bonus Posts: (They were Sooo close to the top ten I had to include them!)

A simple Do It Yourself snack for Kids. Perfect for Thanksgiving! They can put together their own turkey crackers and snack on them while Thanksgiving dinner is being prepared :)

With the use of a sandwich stamper I made this super cute and simple car lunch!

Who would have known? A peanut free Circus Elephant for my peanut free princess! (also includes a discussion on her allergy)

A butterfly sandwich that was almost too beautiful to eat ;) It was so simple to make! I just used what vegetables and fruit we had, but you can easily use what you have in your fridge!

Even though I just made Frosty this month he is quickly becoming one of my (and your!) favorites.  Such a simple, healthy and creative lunch :) Eliana has already requested more Frosty lunches, and of course I will make them! I love that she will eat all that cucumber and bell pepper with no complaints :)


So those were the top Creative Fun Food Posts of 2012!
Thank YOU for making these the top viewed posts of Creative Food! I love them all. I had so much fun this year making every single one of our creations in 2012!  I can't wait to see what creative and fun food we will make in 2013 :)

Happy New Year!! See you in 2013! :)

Rabu, 04 Juli 2012

Fourth of July S'mores

Happy Fourth of July!!
This is totally a late and impromptu post, but I had to share what we made today! :) Plus I figure the celebrations continue through the weekend so it works! We made some Fourth of July Marshmallows and then made some s'mores :)
I found some inspiration from Meaghan at the decorated cookie for this treat! Ever since I stumbled onto her blog over a year ago (and was blown away by her awesomeness!) I was introduced to the idea of drawing on marshmallows. I had always wanted to try it but for some reason never got around to it until today. ((check out all of Meaghan's marshmallow creations here))

Everyone in the family joined in the fun for this! David made the flag on the bottom left and the stars up top.  Eliana made the top right one and I made the two bottom right marshmallows. It was so easy and fun, and of course tasty :)
Perfectly crispy-- just the way I like them!
All smooshed. Probably the only time I can say I smooshed an American Flag and ate it.
These would work perfect for Memorial Day too!

Hope you all had a wonderful Fourth of July!!

Rabu, 16 Mei 2012

Graduation

This past weekend was full of celebrations and family time.  On Friday I graduated with my Masters Degree of Social Work (**happy dance!!**) YEAH!!! :) You can now refer to me as "Master Michelle" ;) We had a nice ceremony on campus and I was so glad to walk across that stage and get my diploma! All of that hard work paid off and I have the diploma in my hand to prove it! My whole family went out to eat afterwards and had our own celebration dinner at La Casa de Pedro, which was amazing.

However after all the celebrations on Friday I woke up feeling super groggy the next morning.  Even after coffee and breakfast I could not seem to wake up myself. I first thought maybe I was just exhausted from graduation and all.  But on Sunday I had a sore throat, it hurt to swallow and talk, and I was officially sick. Even though I didn't feel that great I did have a wonderful Mother's Day with my family :) My cold turned into a mini flu, and I was in bed all day basically for two days. But today is the first day that I feel better and I hope by tomorrow I will feel back to my normal self!

I wanted to post this last weekend, but being sick and all I am posting this today. For Graduation I made some Chocolate Graduation Caps for me myself and moi (don't judge me! it was all about me that day!) OK. I actually did share. Eventually. ;)
 I got inspiration for this treat from Bakerella's Candy Cup Graduation Caps 
These are so simple to make and would be a perfect treat for a graduation party!

To make these Chocolate Graduation Caps you will need:
*mini dark chocolate Reese's peanut butter cups
*One dark chocolate bar (Lindt Dark 70% cocoa Smooth Dark is what I went with)
*yellow candy melts
*one bar will make 10 graduation caps..I think so.. (I counted after we ate some...whoops)

**update to make these peanut free you could use Sun Cups or make your own cups with a Peanut free spread. I made these before we were aware of Eliana's allergy (she did not eat them because she didn't like peanut butter but we didn't know she was allergic).**

First I stuck the Reese's into the freezer for a few minutes so that the sides didn't come off when I took off the wrapper.  While they were in the freezer I broke my candy bar into squares and I melted my yellow candy melts.  I chose that candy bar because I knew that it was squared off already so breaking it off into squares wouldn't be as difficult.

I unpeeled my Reese's peanut butter cups and placed them upside down on a cookie sheet with parchment (or wax) paper. I used the yellow candy melts as "glue" and put a glob of yellow candy melts on the top of each peanut butter cup. Then placed the chocolate square on top of the peanut butter cup (logo facing down, unless you want to represent Lindt lol). Using the candy melts again I made a dot of yellow in the center and made thin strands for the tassel.  

*It may have been a little neater looking had I bought individually wrapped chocolate squares, or used mini M&M's and other things for the top of the graduation cap but since I had yellow candy melts I decided to use what I had. I also chose not to put them on a stick, because honestly that stick would just get thrown away and I'm not a fan of building up extra trash. But by all means if you want to put it on a stick then be my guest!
~*~*~*~

Since Graduation was at 2 in the afternoon, we were going to leave at about 12:30 to get there in time for me to line up and to make sure everyone got seats. I knew that we would all be hungry, especially Eliana.  So I made her a graduation bento:
I whipped this up lunch quickly before we left for graduation.  I cut up some apple and put them into a flower silicone cup (rubbed them with lemon juice to keep them from browning).  Eliana asked for flowers so I cut up some cucumber and carrots into flowers. I then gave her a mini salami and cheese sandwich with 2012 cut out in fruit leather. I could have stacked two sandwiches on top of each other but Eliana wouldn't have eaten that much. She also wasn't a big fan of the salami either.. And lastly I put a Chocolate Graduation Cap for her (see--I did share! But she didn't eat the whole thing because of the PB. She ate the top and David ate the bottom)  The cute little graduation food picks completed the lunch and made it easy to eat with no utensils :)

That was my first official bento on this blog! I've been making them for quite some time, but honestly haven't had the time to take pictures of them all or post them with the hectic last few months. I look forward to sharing some of the ones Eliana and I have made together soon! :)

I would like to wish everyone who graduated this month, and will graduate this year, whether from grade school, high school, college or grad school, Congratulations!! :)

~Master Michelle, MSW :-)


I link up. Check it out! :)

Jumat, 04 Mei 2012

Eye of the Tiger

As I've mentioned before, grad school is coming to an end for me (one week til grduation!!)  The past month especially has been a mad rush to bring everything together; tying up loose ends, finishing my last assignments and presentations, along with a bunch of nerves and anxiety and late nights on top of daily responsibilities.  This past Monday I presented, along with my fabulous group members, our final integrative research project presentation. And after we were done presenting I completely crashed. I could barely keep my eyes open on the drive home, not to mention the other presentations. All the tension and stress leading up to the biggest moment of my MSW grad school education was followed by a complete crash...Yeah, that's how I celebrate ;)

I also finished my last grad school paper ever this past Tuesday night and I attended my last class on Wednesday. I'm feeling pretty good right now :)

In order to make it through these last assignments I've had to pump myself up. I usually do that with music, and for some reason this song was in my mind the entire last month!
"Eye of the Tiger" brings me back to memories of high school track meets and bus rides when we would play our music to pump ourselves up for the competition...good times :)

For my own sanity I pumped myself up to make something other than a paper too ;)  With M&Ms leftover from Eliana's 4th birthday party I made my version of Eye of the Tiger:
Tiger M&Ms!
To make these tiger M&Ms all you need is a lot of orange M&Ms and edible food markers.

First make two circle eyes with the black food safe marker. 
Then with a brown food marker make the nose, mouth and ears.  
The make the tiger stripes with the black food marker.

*In order for your design not to smudge let each part dry first before drawing the next part.

The closest you'll ever want to get with a tiger ;)


And so much better than regular M&Ms ;)

Eliana had fun drawing her own Tiger M&Ms too. She made a bunch of them, but I only happened to get a picture of this one before it went into her mouth ;)  I may be bias, but that is the best looking Tiger M&M I have ever seen.

I call this activity working on her fine motor skills
You can call it whatever you want, but it was fun and delicious.


Want ideas of what to make with other color M&Ms?
Red -- Ladybug M&Ms
Yellow -- Baby Chick M&Ms 

What I used to make these tiger M&Ms:


I link up. Check it out :)

Senin, 02 April 2012

Baby Chick Chocolates

Ever since last year at Eliana's 3rd birthday party when I made the Ladybug M&Ms I've been wanting to make something else out of M&Ms. I am in love with all things mini. And cute. And chocolate.  All three together = Perfection. Sure I could have bought a bag of M&Ms at any time during the year. But lets be honest--they just don't last. My husband, Eliana and I will share a bag sometimes but they are usually all eaten by the time we get home. So I put the thought of M&M mini cuteness on hold.

Then came Eliana's birthday this year.  We filled up a jar with M&Ms in the colors of the rainbow. At the end of the party as we were cleaning up I stared at the jar and thought to myself, what can I do with all those M&Ms? And no, eat them was not the answer to that question. I had something cuter in mind :)
Baby Chick M&M's!
How cute are they? I mean seriously. It doesn't get any cuter that this.
To make these baby chick M&Ms you'll need yellow M&Ms, and edible food color markers (black and orange).  I drew the chicks many different ways, but all of them have hair (orange "W"), eyes (black circles) and a beak (orange triangle).  Some have legs, some have wings.

Originally I had wanted to see which one I liked the best, if I wanted to make them all with wings, or all with feet, or with feet and wings etc. but I couldn't pick one, so I made them all different :) They are all so cute! And of course Eliana prefers these baby chick M&Ms over regular M&Ms. I may or may not have created a monster... 

Here are some tips: 
1. Grab a bunch of yellow M&Ms (or other yellow candy).  
2. Resist the urge to eat them immediately. 
3. Commence drawing! 
4. Admire your artwork. 
5. Now eat! (don't they taste so much better than regular M&Ms? hehe)

These would be a cute addition to a lunch, or just to munch on. by the handful ;)

**please note that M&Ms are not completely peanut free or nut free, even the plain chocolate ones. They contain warnings on the label because they may contain peanuts due to cross contamination. As always with warnings, you are at your own risk. Even though Eliana's allergy isn't severe we buy Sixlets(which are peanut/nut free) instead now after learning of her allergy. These Baby Chick Chocolates could be made with Sixlets too!**


*Linking up to some amazing link parties!*
Cast Party Wednesday

Selasa, 28 Februari 2012

Ladybugs

Today is National Pancake Day!
To celebrate you could get free pancakes at IHOP or you could make some fun ones at home...and of course I decided to make some fun ones at home! We made some Ladybug Pancakes:
These cute pancakes are simple to make:
First mix up your pancake mix, homemade or boxed.  Mix it well so there are no lumps.  I separated my batter into two different bowls for red and brown (I added red food coloring and cocoa powder to make the colors). Once your colored batter is fully mixed then put into a squeeze bottle.


On a skillet or griddle (on low heat) draw out the circle/oval for the lady bug body in red batter. Draw the line down the middle in your brown batter. Outline the head and antennae in the brown batter and then put your ladybug spots on the body.  Let it cook until all nice and bubbly.  Fill in the head with the brown batter and the body with the red batter.  Let the entire pancake cook until bubbly all over.  Gently flip over and let the pancake fully cook on the other side.  Add mini chocolate chips for the eyes.  I added my chocolate chips while the pancake was still on the skillet so they melted a little bit. 


Since Eliana's birthday is coming up (!!!!) I am just remembering how fun her last birthday party was. Last year Eliana loved ladybugs and asked for a ladybug birthday party and all. 


These are some pics of what I did last year for her Ladybug birthday party: ((excuse the quality of the pictures.. I only had a cell phone camera at that time since my camera had just broken!))

First we blew up all red and black balloons and put them everywhere. On some of the red balloons we used a black sharpie and drew spots on them to look like ladybugs.  We also used red and black streamers all over the house :) But the food was the best part:
Ladybug Cake balls inspired by Bakerella
To make these ladybug cake balls I made red velvet cake balls and smooshed them with my hands into an oval shape. Coated them with red candy melts and used dark chocolate candy melts to put the line and spots on the body.  I used a junior mint candy for the head ("glued" with candy melts) and attached two edible candy eyes on the head.
Ladybug M&Ms
Red M&M's + Black foodwriter = Ladybug M&M's
To make these Ladybug M&M's you will need a lot of red M&Ms and a black food safe marker. Simply color one end of the M&M black for the head, draw a line down the middle and put two to four dots on either side of the line. Simple as that! (super time consuming if you need a lot of M&Ms like I did... so enlist help or do it before the party. Not the day of the party. Don't be like me haha)
Ladybugs relaxing on some red velvet cupcakes and green buttercream frosting
Ladybug treat bags can be found here 
Ladybug Fun!
The 3 year old ladybug herself holding a ladybug cakeball! :)
Ladybug costume can be found here (not incl. wings)
Eliana still loves her lady bug costume :) That was such a fun party. I can't believe that was almost a year ago! Eliana will be four in less than a month! Time to plan another party! :)

Jumat, 20 Januari 2012

Peppermint Snowflake Bark

We had more snow. So you know what that means? Snow related treats :) Awhile back when browsing on Pinterest I found a recipe here at Once Upon A Plate to make peppermint bark snowflakes.  I had been planning on making this last year but never got around to it until now. And let me tell you.. I am glad I tried it! They look amazing and taste amazing :)
Chocolate Snowflakes :)
To make this you will need:
approx 8 oz dark chocolate (our favorite is Hershey's Special Dark)
approx 8 oz white chocolate (we used Lindt white chocolate)
2 tsp vegetable oil, divided
1/2 tsp peppermint extract, divided
crushed peppermint candy canes


I bought two bars of chocolate for each the dark and white chocolate.  Both bars were slightly more than 4 oz each so I used a little more than 8 oz of each to make the snowflake bark.


I melted the dark chocolate with 1 tsp of vegetable oil in the microwave.  Once chocolate is fully melted add in 1/4 tsp of peppermint oil.  Pour into desired pan or snowflake silicone mold. (If pouring the chocolate into separate molds it is a good idea to measure out the amount so that the chocolate in each snowflake is evenly distributed.) I added crushed candy canes in the middle layer then allowed the chocolate to harden in the fridge for an hour.


I then did the exact same thing with the white chocolate and returned the mold to the fridge for another hour.


**Tips when pouring chocolate into the mold**
Make sure to tap the mold to make the layer as even as possible (in my case I tapped the mold and tapped the cookie sheet i placed the mold on) 
You can use toothpicks to spread the chocolate into the corners and pop the bubbles.


I also made a mini snowflake for Eliana:

I took the picture next to the other snowflakes so you could see the size difference. To make the smaller snowflake bark for Eliana I used a mini snowflake cookie cutter. I placed the cookie cutter on a cookie sheet lined with parchment paper (make sure there is nothing on or under the parchment paper or else your chocolate will not be flat on the bottom.) I then followed the same directions for the larger snowflakes.  When it was completely done I left out the snowflake for a few minutes to allow the chocolate to warm up a little bit.  Then I gently pushed the snowflake out of the cookie cutter.  There was some breakage since I didn't do it as gently as I should have, but Eliana' couldn't tell and you can't see in the picture so it works out just fine!!

This may have been a little time consuming but it was so easy and it tasted so amazing that it was all worth it!  I actually don't like white chocolate but with the addition of peppermint extract and the candy canes, alongside the amazing opposite side of dark chocolate I ended up loving this. I will definitely be making these again!

Until Next Time... :)

Rabu, 14 Desember 2011

Christmas Tree Cake Balls

Yes. Christmas Tree again. I sense a tree theme this year :) I can't promise that I won't make anything else Christmas Tree related again since Eliana has asked for more Christmas tree sandwiches and well we may just have to show you what we make! :)  So the other weekend was my grandpa's birthday party.  All the family got together and we had such a good time! I usually make more than one dessert but this year I was running on four hours of sleep from Eliana being sick the night before and me trying to finish my 9-11 page paper!  I decided that I wanted to make some cake balls. If you have never heard of cake balls feel free to check out Bakerella, the Queen of all things cake ball and cake pop related. I love making cake balls and have been making them for over a year now. You can use your own made from scratch cake recipe, or a boxed cake mix. If you are running on low sleep may I suggest the latter ;)


Here is what I came up with..
Christmas Tree Cake Balls!
I'm really happy with how it turned out! And they all disappeared--so it was a hit! I made chocolate cake balls and covered them with dark green candy melts (I got mine at A.C. Moore). I chose to drizzle some of them with red candy melts and red sugar sprinkles (add the sprinkles before the drizzle dries completely). With the rest of the cake balls I used yellow candy melts and made little "lights" and the star on the top. The "trunk" I left the cake balls bare.. but if you aren't as lazy (or sleep deprived) as me you could coat them with chocolate :)


Cake balls are a dessert that anyone can make.  Seriously--go out and try to make them.  You can tweak them and use different cake mixes or frostings, or even try it with brownies instead!  They taste amazing and look adorable. Once you've had one, you'll understand how amazing they are! :)


Until next time.. :)


I link up.