Tampilkan postingan dengan label recipe. Tampilkan semua postingan

Selasa, 19 Maret 2013

Rice Krispies PEEPS and over 20 PEEPS ideas!

PEEPS PEEPS Glorious PEEPS! What says spring more than PEEPS? For me PEEPS is to Easter/Spring like Conversation Heart Candy is to Valentine's Day.

When Michelle of Sugar Swings! Serve Some and Christi of Love from the Oven asked if I wanted to join in on a celebration of PEEPS with a blog hop and a giveaway I was so excited!!! Plus it is the 60th anniversary of PEEPS! 

So to celebrate I went straight to BJ's and bought a ginormous pack of PEEPS. 
 But what to do with all these PEEPS?! Seriously. There were over 40 PEEPS in that package. So I finally came up with the idea to make Rice Krispies PEEPS! I felt like a genius! Before weighing them all out to try to figure out how many would be necessary to replace regular marshmallows I did some searching online-- because I figured I couldn't have been the first genius with this idea. And I wasn't ;) I found this recipe on Serious Eats and decided to try it out!

Rice Krispies PEEPS:
Ingredients:
3 TBSP butter
6 cups Rice Krispies Cereal

Directions:
1. In a large pot melt butter over low heat.

2. Take the PEEPS and put them in your saucepan. Continue to stir and let them melt. Don't mix the colors until you add the Rice Krispies, but do move the PEEPS around so they don't burn/stick to the bottom of the pan. Remove pot from heat once PEEPS are all melted. (I kind of jiggled them around in their own section to keep them from sticking to the pan)

3. Add Rice Krispies cereal and stir until well coated.

4. Press mixture into desired pan coated with cooking spray (I used a 13x9 inch pan)

5. Cool completely before cutting.
So I separated my PEEPS like this when melting. I kept them in their own section without mixing the colors before adding the Rice Krispies. The package of PEEPS I got from BJ's only came with these three colors, but you could use any colors you want! However I would keep it to only three colors of PEEPS. When I was mixing the Rice Krispies in I was very careful because I didn't want to get any brownish colors from overmixing (which did happen in a few areas).

What you'll get is something that looks like this:
Aren't they pretty!? I loved the mix of colors! And they look nothing like the bright neon colors of the PEEPS. My brother had thought I used Fruity Pebbles!
And look who's PEEPing behind these yummy treats! ;)
These were seriously SO easy to make and Eliana loved helping me make them!

Now Hop along and check out over 20+ PEEPS ideas from these amazing bloggers!! 
I am so thankful to be included among bloggers who I virtually stalk admire!

Ready for more fabulous PEEPS recipes and ideas???  Visit the following websites, each is sharing an amazing PEEPS post for you today, so hop on over and check them all out!   Don't forget to enter to win the fabulous PEEPS Prize Pack as well!  Happy Spring!
Would you like a chance to win some PEEPS? 
...because I know you are just dying to make some Rice Krispies PEEPS now ;) 
Well you're in luck! Enter below to win this PEEPS Prize Pack!!
Open to US Residents Only. Use the Rafflecopter Widget below to enter, 
please remember it can be slow to load. Good luck!

Kamis, 08 November 2012

Support For Sandy #FBS4Sandy


Today's post is in honor of the Hurricane Sandy Victims.
Hurricane Sandy swept through the east coast and left so much destruction behind.  Millions were affected. We only lost power for one day where we lived, but there are many that continue to be without power and are in need of help. I'm sure you've seen some of the pictures. They are horrific and devastating. As I sit here cold (I'm always cold), even in our heated house, I feel awfully detached from the tragedy. Losing power for one day is nothing in comparison to what the storm has done to many. I am thankful my family in MA, CT, NY and NJ are all safe and had no major problems with their health or their houses.  Some of my family members in NY still don't have power and have had to stay in gas lines for hours.

Jenn Oliver of Jenn Cuisine is calling for all food bloggers to support the victims of Sandy: To post a comfort dish, something that you would make for someone in need to help them feel at home. I don't blog many recipes on my blog that I would consider comfort dishes. But these Oatmeal Energy Bites are super yummy. The perfect comfort snack that is so simple and easy to put together, with items you most likely have in your pantry already: perfect to make for someone in need.

If you are able to donate to those in need here are some of the major organizations that are helping the victims of Hurricane Sandy:

Red Cross is providing food, shelter, and other forms of support to hurricane victims. You can donate directly to the Red Cross or you can also text the word "Redcross" to 90999 to make a $10 donation

Salvation Army is focused on providing food, shelter and support to victims, and takes donations to storm relief

Feeding America is providing food, water and supplies to those who need it as part of their disaster relief program

Kids with Food Allergies has created a community blog that will post updates on how you can help donate and where you can go to obtain allergy-friendly foods

Or click on this button to go straight to Red Cross to donate:


Here are some other posts from my friends in honor of Support for Sandy:
Bentobloggy
Bentoriffic
Mamabelly's Lunches with Love
Mommy + Me Lunch Box

Jumat, 12 Oktober 2012

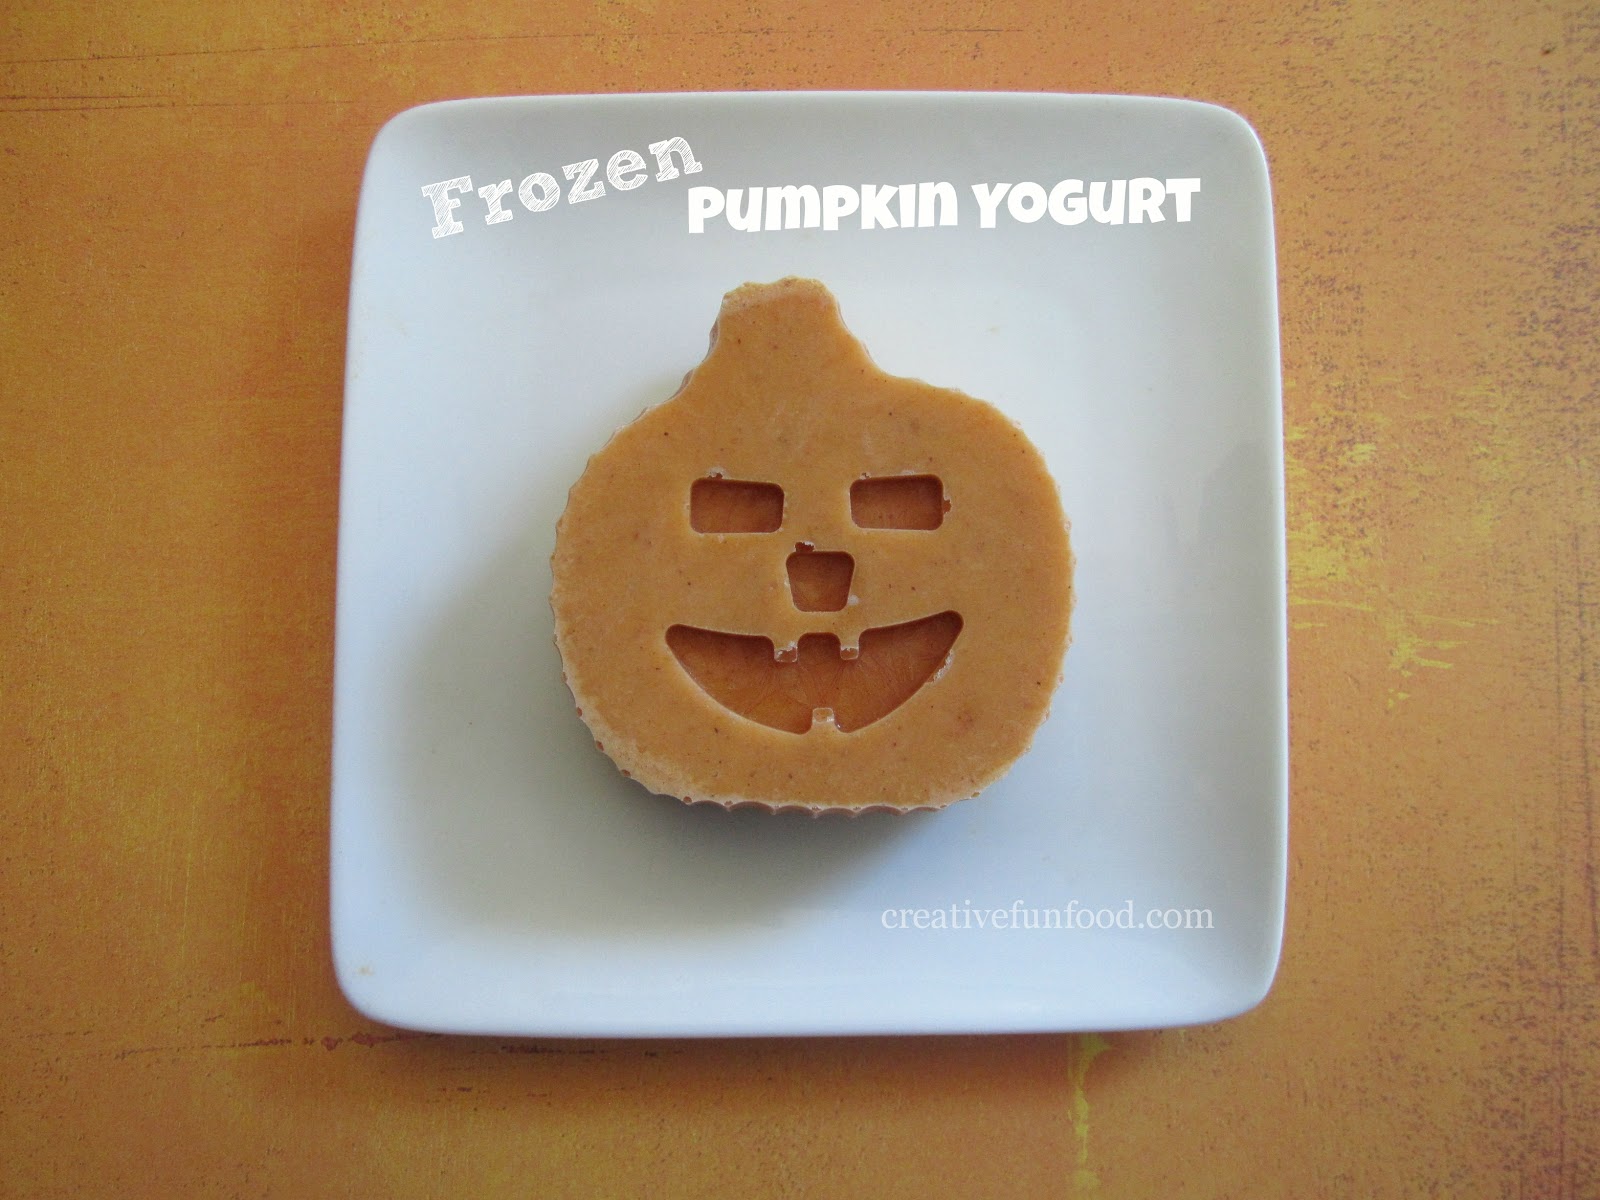
Frozen Pumpkin Yogurt Recipe and Tutorial

A few weeks ago Eliana and made a few batches of different pumpkin cookies, pumpkin bread, pumpkin muffins and pumpkin waffles (pumpkin overload! we love pumpkin!) and we had half a can of pumpkin left.  And even though I love to bake I was not going to make more cookies (at least not for another week or so lol)
So we made pumpkin yogurt. And then froze it. Into mini pumpkin shapes!
I mentioned in my post earlier this week that I was introduced to the idea of freezing yogurt into shapes by Keeley McGuire and Bent On Better Lunches this past summer. Ever since then we have kept frozen yogurt shapes in all different flavors in our freezer.  When it was hot Eliana loved to have them straight from the freezer as a snack.  She also loves to have them on top of some yogurt vanilla so she can "crunch" and "mush" them together.

To make your own Frozen Pumpkin Yogurt you'll first need to get your ingredients together.
Mix these ingredients well and fill a silicone ice cube tray. You may need to do a few rounds of freezing if you only have one ice cube tray. We decided to use this pumpkin silicone ice cube tray we found at the dollar store.
After freezing gently pop out your yogurt and it should look something like this:
You can use silicone baking cups to freeze your yogurt too. They would fit perfect into a lunchbox as well and would defrost by lunchtime. We used pumpkin silicone cups we found at Christmas Tree Shops.
After your pumpkin yogurt is frozen pop them out of the mold and place into a freezer bag or container and keep in your freezer. Take them out when needed. Or put them in your lunchbox. Simple as that! Who knew frozen yogurt shapes were that easy! :)

Frozen Pumpkin Yogurt
Ingredients:*
1/2 can of pumpkin (about 7 oz)**
1 cup of vanilla yogurt
2 tsp of ground cinnamon
1/4 tsp ground ginger
1/4 tsp nutmeg
1/4 tsp ground cloves (optional)
1 tsp of sugar (optional)

Instructions:
Mix all ingredients together. 


...and voila! that is it! You can eat it now or freeze it. We prefer the latter.

To Freeze:
*pour pumpkin yogurt into pumpkin silicone ice cube tray (or regular ice cube tray, or another shaped silicone ice cube tray)
*freeze for a few hours.
*once pumpkin yogurt is frozen you can remove them from the tray and place in a freezer bag or freezer container.
*pop a frozen pumpkin yogurt in a lunchbox or eat for a snack!

*The ingredients are estimated, and are completely flexible! Everything is optional and should be made to your taste preferences! Put more pumpkin, or more yogurt, or better yet more cinnamon (you can never have too much cinnamon!) We started off with small amounts and I let Eliana be the taste tester. She asked for more cinnamon and so I added more cinnamon in small increments until she said it was good. I would encourage you to have your kid be your taste tester too!
**Depending on which brand of pumpkin you use your frozen pumpkin can look orange, or more of a muted orange. Either way works but we prefer Libby's Pumpkin (what we used in these pictures).

What I used to make this snack (or similar):

I link up.

Senin, 13 Agustus 2012

Guest Post over at MOMables!

Today I am guest posting at MOMables!  

You may not know, but I LOVE to bake. I don't share it that often here on Creative Food, but I am happily sharing it over at MOMables. This recipe is a family favorite and we make these Carrot & Zucchini Bars (peanut-free and nut-free) often! Check it out! :)


**Also stay tuned later this week for my review of MOMables and a giveaway!**

Rabu, 01 Agustus 2012

SoyNut Butter Review and a Recipe

Are you looking for a peanut butter substitute?  Well say hello to SoyNut Butter.
Eliana loves it. And my dad likes it too. Now this is a big feat for us.  As you know, Eliana is allergic to peanuts, cashews and pistachios.  My dad is highly allergic to sunflower seeds, pecans, and well basically every nut except the ones that Eliana is allergic to.  I say highly because when he even gets close to them he starts to feel funny. So far, thankfully, Eliana only has had reactions with direct contact. But between the two of them they cover all the nuts!

I.M. Healthy SoyNut Butter does not contain peanuts, tree nuts of any type, sesame, sunflower, dairy, egg, wheat (gluten), fish or shellfish.  Their products are manufactured in a facility free of those ingredients to eliminate cross contamination. SoyNut Butter is made from soybeans.

The reason I.M. Healthy SoyNut Butter is so awesome is because I don't even need to worry about cross contamination within my own family! You see, we like Sunflower seed butter, but my father is allergic. My father loves peanut butter, but Eliana is allergic. It means that we have to be super safe when making any nutbutter sandwiches-- by using separate knives to ensure that there is no cross contamination issues that could hurt either one of them.  SoyNut Butter can be eaten by both of them (neither are allergic to soybeans) and I really really really appreciate there being a product out there that they can enjoy together! There are also a lot of versions too-- Eliana's favorite is the Honey Creamy SoyNut Butter. I honestly cannot wait to get my hands on the Chocolate SoyNut Butter, and I'd love to try the crunchy too.

SoyNut Butter would also work perfect in a lot of recipes as a peanut butter substitute. I know Eliana would love that!  I was thinking about whipping something up when on Monday I.M. Healthy SoyNut Butter put a recipe on their Facebook page. So I decided to try it out, with Eliana as my sous-chef of course, and this was the result:
Chocolate SoyNut Bars (easy no bake dessert!)
Gorgeous aren't they? They were a hit! David and Eliana love them! For me, they are a bit too sweet and I might play around with the recipe next time I make them but they were good, especially with a tall glass of milk.  We don't have a food processor so I improvised and used our Ninja, so it might have taken longer to come together but it worked out just fine :)

Ingredients:
*2T butter, melted
*3/4 cup I.M. Healthy SoyNut Butter
*2 cups confectioners sugar
*3/4 cup crushed graham crackers
*2-4 T apple juice
*3/4 cup chocolate chips

Directions:
*Combine butter and I.M. Healthy SoyNut Butter in food processor. 
*Add sugar and graham crackers, drizzling in just enough apple juice (one tablespoon at a time) to make the dough stick together, but not enough to make it wet.
*Press dough into 8" x 8" pan. Chill for 20 minutes
*Meanwhile melt chocolate chips
*pour and spread over dough. Chill for 20 minutes
*Cut into squares, or desired shape and enjoy :)
(recipe taken from their Facebook Page)

So we are really enjoying our new peanut butter substitute! I will definitely be using it in recipes to come. We have finally found one PB substitute that everyone in the family likes, and that for us was not easy. I did some research (research = calling up a bunch of stores) and I found out that Whole Foods (well one of the ones by us) carries a lot of I.M. Healthy SoyNut Butter variations.. including the chocolate one.. yummy..... I think I know where I am going today.. you know for research... ;)


Disclaimer: I received one jar of Original Creamy SoyNut Butter free from I.M. Healthy but it was my decision to do a post and all opinions are my own.

Selasa, 06 Maret 2012

Shamrock Ice Cream Jello

 
Eliana and I decided to make Jell-O the other day. While Jell-O is nothing new, it still is fun and super easy to put together. Thinking of St. Patrick's Day we went with lime green Jell-O.  I had found a recipe for green ice cream Jell-O and decided to make it even more fun by cutting the Jell-O with a shamrock cookie cutter. Here is how it all turned out:
Vanilla Bean Ice Cream Shamrock Jell-O 
Vanilla Bean Ice Cream Shamrock Jell-O
Ingredients:
*2 packages of green Jell-O
*1 package knox unflavored gelatin
*4 cups boiling water
*approx 1 qt (or less) vanilla bean ice cream

Directions:
*Mix everything together (both packages of Jell-O, gelatin, and boiling water) until dissolved
*Add vanilla bean ice cream. Stir until dissolved.
*pour into a 9x13 glass dish and let it set overnight in the fridge.
*cut Jell-O with a shamrock (or any shape) cookie cutter, or just cut however you please :)

  **recipe adapted from yummly**

The ice cream will float to the top of the Jell-O creating a layered look:
So the original recipe said to go with non fat vanilla ice cream. Well as you can see I used vanilla bean ice cream. I wasn't going to buy a tub of regular vanilla ice cream! We are vanilla bean ice cream addicts in this household. If you don't want the vanilla beans floating around in your Jell-O then just use vanilla :)
The original recipe also said to measure 1 qt (less one cup) of your ice cream. Well about that.. I have a secret.... (shhhh don't tell)......I didn't actually measure the ice cream. I just scooped the ice cream into the Jell-O mixture until Eliana and I thought it was enough.  I'm lucky it came out pretty even but honestly I didn't know how it was going to turn out! Either way it would have tasted great so I don't think measuring exacts on ice cream is necessary. Of course feel free to measure away. 

I'm actually usually all about measuring in exact measurements (i love to bake, and for baking you need to be precise) but for some reason in this instance I didn't care to be exact. For a moment my precise exact perfectionist self disappeared and I just enjoyed the moment of mixing and making Jell-O with my daughter :) I think that made it taste even better :)

**Linking up to these parties**

Kamis, 23 Februari 2012

Oatmeal Energy Bites

If you know me well, you know not to mess with me when I'm hungry. I go from sorta hungry to "oh-my-goodness-i-feel-fatigue-and-will-drop-over-and-die-now-unless-you-can-feed-me-NOW" in a matter of minutes/seconds. No joke. So to all my  family members or friends that have seen me like that...sorry.

My hunger always catches me by surprise, even though I've always been like this and this is nothing new. I'm always snacking on things so that I don't get to that hunger crazy point.  I do try to snack healthy (baby carrots, and raw bell peppers for ex.), but I tend to go to the crackers, and cookies since they are so much more tastier..so lately I have been looking for a snack that I could eat between meals and would be somewhat filling and healthy, taste good and could curb my hunger craziness (I know a lot of criteria for a snack). But I found IT. Energy Bites. Oatmeal Energy Bites of goodness. No bake, super easy and I love them:

Yes.. I realize lots of bites going on over here (date bites, oatmeal energy bites..) But somehow everything to me always tastes better when shaped into a ball. Take cake balls for instance. Way better than cake. 

When I found this recipe I first knew I had to try it immediately, and second I knew I was going to love it. Now I make a batch of Oatmeal Energy Bites about once a week... we are sort of addicted to them in our household and many friends have asked me to share these addicting bites so here they are!


Ingredients:
*1 cup dry oatmeal (I used old-fashioned style oats, but quick cooking oats would work too)
*1 cup toasted coconut flakes (toasting is optional.. but recommended by yours truly)
*1/2 cup chocolate chips
*1/2 cup nut butter (soy butter, sunbutter, almond butter, peanut butter-- depends what you can have)
*1/2 cup ground flaxseed
*1/3 cup honey
*1 tsp. vanilla

Mix all the ingredients together until thoroughly mixed.  Put the mixture in the refrigerator for a half hour to chill.  Then you can roll the mixture into balls, or mold them into bars, or whatever shape you want.  Store them in an airtight container and keep them in the refrigerator for up to one week. Super easy. Super quick.
Depending on how big/small you make the bites this recipe will yield different amounts of Oatmeal Energy Bites. The last batch I made 24.
(recipe from gimme some oven! adapted from Smashed Peas and Carrots)

With my busy schedule I don't always have the time to roll the bites after waiting for them to chill.  For example the last batch I made I didn't have time because I had to get to my night classes (from 4-9pm! fun fun!).  So I mixed all the ingredients together before I left for class, put them in an airtight container and let it chill over night.  I rolled the bites the next morning.

Sometimes I find if you take the desired amount of mixture and squish it into your palm like a stress reliever ball it does two things for you: 1. it  de-stresses you. 2. the bites come together easier ;)

Minggu, 19 Februari 2012

Date Bites

So have you ever taken a picture of something that tastes so good but yet the picture is a disastrous fail? Example one:
Date Bites are amazing. I love them, Eliana loves them, my entire family loves them.. and we'll I'm sure almost anyone would love them! However... They kinda, sorta... look like poop. Little poop balls. There ya go. I straight out said it.  They are just about the most unattractive things I have ever seen!


Example two:
...yeah... still looks like poop to me. Like I said on my first blog post, I am no food photographer. I absolutely love food photography.. and I could stare at beautiful pictures of food all day.. However I am not skilled in that area. Somehow this amazing snack looks inedible. But don't take judge these date bites by the cover. They are a great and healthy snack to have around the house!


Date Bites
Ingredients:
*about 3/4 cup of pitted dates
*1/2 tsp vanilla extract
*1/16 tsp salt
*2 T Dutch-pressed cocoa powder
*2 T shredded coconut
*1/3 cup raw pecans


*Soak dates in water while putting all the ingredients together in your blender, or food processor. This will help everything blend quicker.. but you can omit this step (I usually soak mine for less than 2 mintues, just about the amount of time it takes to put all the ingredients in my blender.  Even if you soak the dates too long they will still come out amazing, but they will be stickier.)


*Blend all ingredients together. (I used my Ninja Master Prep Bowl (not the pitcher) and pulsed all the ingredients until they started to come together.)


*Squish the "dough" together and then roll into balls or whatever shape you prefer (you can squish the dough with your hands or put in in a plastic ziploc bag and squish it that way, mess free--Eliana loves to help do this)


*May I suggest you not roll them into balls like I did... then maybe they wouldn't be so unattractive ;)


 **I know that they have been called Fudge Bites and I have seen different recipe names on numerous blogs, but I prefer not to hide the fact that they are dates. I want my daughter to understand that she is eating dates which are healthy and good for you, not fudge, for a snack! But to each, his/her own.. so call them what you please!
 **recipe ever so slightly adapted from Chocolate-Covered Katie**
Example three:
Trust me, these are yummy.  This is such a creative way of using dates. You could always add more pecans if you want more crunch. My father is allergic to pecans, so for him I would omit the pecans, or add a nut that he isn't allergic to. Eliana absolutely loves them.. she asks to make them with me.. which is fine with me since it only takes all but three minutes to put together and is super easy! She helps pulse the blender, squish the dough, and most importantly she helps me taste test :)

Jumat, 20 Januari 2012

Peppermint Snowflake Bark

We had more snow. So you know what that means? Snow related treats :) Awhile back when browsing on Pinterest I found a recipe here at Once Upon A Plate to make peppermint bark snowflakes.  I had been planning on making this last year but never got around to it until now. And let me tell you.. I am glad I tried it! They look amazing and taste amazing :)
Chocolate Snowflakes :)
To make this you will need:
approx 8 oz dark chocolate (our favorite is Hershey's Special Dark)
approx 8 oz white chocolate (we used Lindt white chocolate)
2 tsp vegetable oil, divided
1/2 tsp peppermint extract, divided
crushed peppermint candy canes


I bought two bars of chocolate for each the dark and white chocolate.  Both bars were slightly more than 4 oz each so I used a little more than 8 oz of each to make the snowflake bark.


I melted the dark chocolate with 1 tsp of vegetable oil in the microwave.  Once chocolate is fully melted add in 1/4 tsp of peppermint oil.  Pour into desired pan or snowflake silicone mold. (If pouring the chocolate into separate molds it is a good idea to measure out the amount so that the chocolate in each snowflake is evenly distributed.) I added crushed candy canes in the middle layer then allowed the chocolate to harden in the fridge for an hour.


I then did the exact same thing with the white chocolate and returned the mold to the fridge for another hour.


**Tips when pouring chocolate into the mold**
Make sure to tap the mold to make the layer as even as possible (in my case I tapped the mold and tapped the cookie sheet i placed the mold on) 
You can use toothpicks to spread the chocolate into the corners and pop the bubbles.


I also made a mini snowflake for Eliana:

I took the picture next to the other snowflakes so you could see the size difference. To make the smaller snowflake bark for Eliana I used a mini snowflake cookie cutter. I placed the cookie cutter on a cookie sheet lined with parchment paper (make sure there is nothing on or under the parchment paper or else your chocolate will not be flat on the bottom.) I then followed the same directions for the larger snowflakes.  When it was completely done I left out the snowflake for a few minutes to allow the chocolate to warm up a little bit.  Then I gently pushed the snowflake out of the cookie cutter.  There was some breakage since I didn't do it as gently as I should have, but Eliana' couldn't tell and you can't see in the picture so it works out just fine!!

This may have been a little time consuming but it was so easy and it tasted so amazing that it was all worth it!  I actually don't like white chocolate but with the addition of peppermint extract and the candy canes, alongside the amazing opposite side of dark chocolate I ended up loving this. I will definitely be making these again!

Until Next Time... :)

Minggu, 18 September 2011

Taco "Cupcakes"

Sometimes for dinner you just want something fun and creative and not necessarily in the shape of an animal. And no I don't make animal shaped sandwiches for dinner. I know you were wondering..


One day I was browsing on Pinterest and I found a few pins with recipes using won ton wrappers in a cupcake pans. One of the many recipes was a taco "cupcake".  I love tacos and I love cupcakes so this was a win-win situation! So I thought I would try out some of the recipes and then of course tweak it to my own liking.
(Before we go any further if you don't know what Pinterest is by now then you don't need to know. I'm warning you.. its highly addictive.)


Taco Cupcakes

Taco "Cupcakes" Ingredients
1 package won ton wrappers (you can find them in the produce section)
about 1 lb of ground beef (or say around 1.23 lbs. if you really want an exact number)
1 can (15.5oz) of black beans, drained and rinsed
1 can (8.5oz) whole kernel golden corn, drained and rinsed
1 packet of taco seasoning (or your own seasonings..whatever you prefer)
1 1/2 to 2 cups of shredded cheese (use cheddar or Mexican blend, or your favorite blend)
desired taco toppings (for example: lettuce, tomato, sour cream)


*Preheat the oven to 375
*Cook ground beef in a skillet until no pink shows (if desired drain fat... I personally don't always drain the fat since I use very lean ground beef already)
*After fully cooked add Taco seasoning packet and 2/3 cup water OR add your own taco seasonings and water/liquid
*Add rinsed and drained beans and corn
*Mix meat, bean and corn mixture and cook for 5 to 10 minutes
*Spray cupcake pan with any kind of cooking spray
*Gently push one won ton wrapper into each cupcake cup
*Next spoon 1Tbsp of meat mixture in the won ton wrapper
*Sprinkle cheese over the meat mixture
*Make a second layer of won ton wrappers.  Gently push the won ton wrapper, in the opposite direction, and repeat with 1Tbsp of meat mixture and some cheese.
*Bake for 10 to 20 minutes, really depending on what you like best.  I enjoy my taco "cupcakes" to be brown and crispy on the edges.


*Leave the taco "cupcakes" in the cupcake pan for a few minutes before trying to remove them so you let them settle, but more importantly so you don't burn your fingers.
*Then add all your favorite taco toppings.  In my family's case we take a buffet style approach to serving these.  I serve cut up tomatoes, lettuce, sour cream, cheese, and salsa verde all in different bowls and everyone makes their own taco.


(This recipe makes so many taco cupcakes so be prepared.  Each time I make a different amount but last time I made 24 and I still had leftover meat mixture.  Just put your leftover meat mixture in the fridge and use in another dinner or to make more taco cupcakes later!)


I hope you enjoy these as much as my family does!


and p.s. I told you! I warned you! Pinterest IS addictive and amazing. Especially for us visual folks ;)


Until Next Time... :)