Selasa, 28 Februari 2012

Ladybugs

Today is National Pancake Day!
To celebrate you could get free pancakes at IHOP or you could make some fun ones at home...and of course I decided to make some fun ones at home! We made some Ladybug Pancakes:
These cute pancakes are simple to make:
First mix up your pancake mix, homemade or boxed.  Mix it well so there are no lumps.  I separated my batter into two different bowls for red and brown (I added red food coloring and cocoa powder to make the colors). Once your colored batter is fully mixed then put into a squeeze bottle.


On a skillet or griddle (on low heat) draw out the circle/oval for the lady bug body in red batter. Draw the line down the middle in your brown batter. Outline the head and antennae in the brown batter and then put your ladybug spots on the body.  Let it cook until all nice and bubbly.  Fill in the head with the brown batter and the body with the red batter.  Let the entire pancake cook until bubbly all over.  Gently flip over and let the pancake fully cook on the other side.  Add mini chocolate chips for the eyes.  I added my chocolate chips while the pancake was still on the skillet so they melted a little bit. 


Since Eliana's birthday is coming up (!!!!) I am just remembering how fun her last birthday party was. Last year Eliana loved ladybugs and asked for a ladybug birthday party and all. 


These are some pics of what I did last year for her Ladybug birthday party: ((excuse the quality of the pictures.. I only had a cell phone camera at that time since my camera had just broken!))

First we blew up all red and black balloons and put them everywhere. On some of the red balloons we used a black sharpie and drew spots on them to look like ladybugs.  We also used red and black streamers all over the house :) But the food was the best part:
Ladybug Cake balls inspired by Bakerella
To make these ladybug cake balls I made red velvet cake balls and smooshed them with my hands into an oval shape. Coated them with red candy melts and used dark chocolate candy melts to put the line and spots on the body.  I used a junior mint candy for the head ("glued" with candy melts) and attached two edible candy eyes on the head.
Ladybug M&Ms
Red M&M's + Black foodwriter = Ladybug M&M's
To make these Ladybug M&M's you will need a lot of red M&Ms and a black food safe marker. Simply color one end of the M&M black for the head, draw a line down the middle and put two to four dots on either side of the line. Simple as that! (super time consuming if you need a lot of M&Ms like I did... so enlist help or do it before the party. Not the day of the party. Don't be like me haha)
Ladybugs relaxing on some red velvet cupcakes and green buttercream frosting
Ladybug treat bags can be found here 
Ladybug Fun!
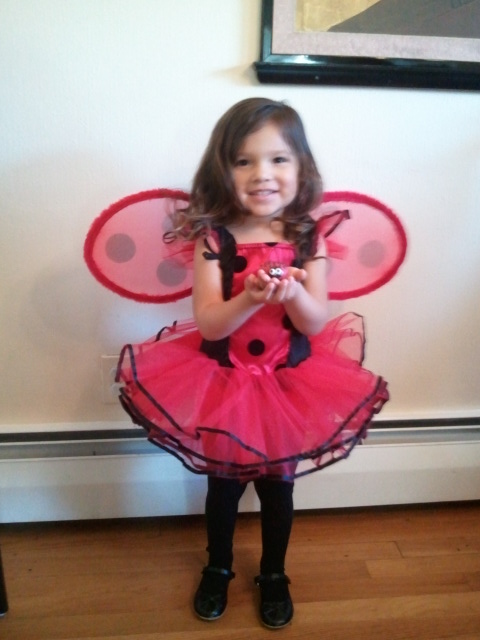
The 3 year old ladybug herself holding a ladybug cakeball! :)
Ladybug costume can be found here (not incl. wings)
Eliana still loves her lady bug costume :) That was such a fun party. I can't believe that was almost a year ago! Eliana will be four in less than a month! Time to plan another party! :)

Kamis, 23 Februari 2012

Oatmeal Energy Bites

If you know me well, you know not to mess with me when I'm hungry. I go from sorta hungry to "oh-my-goodness-i-feel-fatigue-and-will-drop-over-and-die-now-unless-you-can-feed-me-NOW" in a matter of minutes/seconds. No joke. So to all my  family members or friends that have seen me like that...sorry.

My hunger always catches me by surprise, even though I've always been like this and this is nothing new. I'm always snacking on things so that I don't get to that hunger crazy point.  I do try to snack healthy (baby carrots, and raw bell peppers for ex.), but I tend to go to the crackers, and cookies since they are so much more tastier..so lately I have been looking for a snack that I could eat between meals and would be somewhat filling and healthy, taste good and could curb my hunger craziness (I know a lot of criteria for a snack). But I found IT. Energy Bites. Oatmeal Energy Bites of goodness. No bake, super easy and I love them:

Yes.. I realize lots of bites going on over here (date bites, oatmeal energy bites..) But somehow everything to me always tastes better when shaped into a ball. Take cake balls for instance. Way better than cake. 

When I found this recipe I first knew I had to try it immediately, and second I knew I was going to love it. Now I make a batch of Oatmeal Energy Bites about once a week... we are sort of addicted to them in our household and many friends have asked me to share these addicting bites so here they are!


Ingredients:
*1 cup dry oatmeal (I used old-fashioned style oats, but quick cooking oats would work too)
*1 cup toasted coconut flakes (toasting is optional.. but recommended by yours truly)
*1/2 cup chocolate chips
*1/2 cup nut butter (soy butter, sunbutter, almond butter, peanut butter-- depends what you can have)
*1/2 cup ground flaxseed
*1/3 cup honey
*1 tsp. vanilla

Mix all the ingredients together until thoroughly mixed.  Put the mixture in the refrigerator for a half hour to chill.  Then you can roll the mixture into balls, or mold them into bars, or whatever shape you want.  Store them in an airtight container and keep them in the refrigerator for up to one week. Super easy. Super quick.
Depending on how big/small you make the bites this recipe will yield different amounts of Oatmeal Energy Bites. The last batch I made 24.
(recipe from gimme some oven! adapted from Smashed Peas and Carrots)

With my busy schedule I don't always have the time to roll the bites after waiting for them to chill.  For example the last batch I made I didn't have time because I had to get to my night classes (from 4-9pm! fun fun!).  So I mixed all the ingredients together before I left for class, put them in an airtight container and let it chill over night.  I rolled the bites the next morning.

Sometimes I find if you take the desired amount of mixture and squish it into your palm like a stress reliever ball it does two things for you: 1. it  de-stresses you. 2. the bites come together easier ;)

Minggu, 19 Februari 2012

Date Bites

So have you ever taken a picture of something that tastes so good but yet the picture is a disastrous fail? Example one:
Date Bites are amazing. I love them, Eliana loves them, my entire family loves them.. and we'll I'm sure almost anyone would love them! However... They kinda, sorta... look like poop. Little poop balls. There ya go. I straight out said it.  They are just about the most unattractive things I have ever seen!


Example two:
...yeah... still looks like poop to me. Like I said on my first blog post, I am no food photographer. I absolutely love food photography.. and I could stare at beautiful pictures of food all day.. However I am not skilled in that area. Somehow this amazing snack looks inedible. But don't take judge these date bites by the cover. They are a great and healthy snack to have around the house!


Date Bites
Ingredients:
*about 3/4 cup of pitted dates
*1/2 tsp vanilla extract
*1/16 tsp salt
*2 T Dutch-pressed cocoa powder
*2 T shredded coconut
*1/3 cup raw pecans


*Soak dates in water while putting all the ingredients together in your blender, or food processor. This will help everything blend quicker.. but you can omit this step (I usually soak mine for less than 2 mintues, just about the amount of time it takes to put all the ingredients in my blender.  Even if you soak the dates too long they will still come out amazing, but they will be stickier.)


*Blend all ingredients together. (I used my Ninja Master Prep Bowl (not the pitcher) and pulsed all the ingredients until they started to come together.)


*Squish the "dough" together and then roll into balls or whatever shape you prefer (you can squish the dough with your hands or put in in a plastic ziploc bag and squish it that way, mess free--Eliana loves to help do this)


*May I suggest you not roll them into balls like I did... then maybe they wouldn't be so unattractive ;)


 **I know that they have been called Fudge Bites and I have seen different recipe names on numerous blogs, but I prefer not to hide the fact that they are dates. I want my daughter to understand that she is eating dates which are healthy and good for you, not fudge, for a snack! But to each, his/her own.. so call them what you please!
 **recipe ever so slightly adapted from Chocolate-Covered Katie**
Example three:
Trust me, these are yummy.  This is such a creative way of using dates. You could always add more pecans if you want more crunch. My father is allergic to pecans, so for him I would omit the pecans, or add a nut that he isn't allergic to. Eliana absolutely loves them.. she asks to make them with me.. which is fine with me since it only takes all but three minutes to put together and is super easy! She helps pulse the blender, squish the dough, and most importantly she helps me taste test :)

Selasa, 14 Februari 2012

Pretty Heart Pancakes

Pancakes. Again.


I swear we don't just eat pancakes in this household... It just so happens to be that I have done three pancake posts in a row.. But these ones were just too pretty not to share!
Pretty Heart Pancake
These were Eliana's favorite pancakes, and mine too!  These pancakes will most certainly impress anyone, regardless of age!


To make these Pretty Heart Pancakes you start with your pancake batter mix.  Make sure to mix it well so there are no lumps.  I put a few drops of red food coloring to make this pink color and then I put the batter into a squeeze bottle.


On a skillet or griddle (on low heat) I drew the inner heart and then the outer heart.  Then I freely drew some swirls, making sure to connect the pieces together so that the pancake would be one piece and that everything would be attached. As soon as the inner heart cooked a little bit I filled the inside.  I let the entire pancake almost fully cook and then I gently (ever so gently) flipped the pancake over and cooked the other side.


These pancakes are much more delicate since most of it isn't filled in, so you have to be more careful when it comes to flipping the pancake over. They can easily break-- trust me ;)
Aren't they so pretty? Might be so pretty but making them weren't so easy for me! My batter was too runny and so when I wanted to make some finer line designs a lot of batter would just come out and result in larger bulkier lines and designs.. However they still looked great! Next time I want to make pancakes with finer designs I'll need to make sure the batter isn't too runny.  Who knows..with an almost 4 year old and a 12 week old puppy running around me at all times I may have mis-measured the ingredients ;)


Happy Valentine's Day! :) 


Minggu, 12 Februari 2012

Open Heart Pancakes

I love breakfast food. And I love pancakes. I really love how simple it is to make fun and creative pancakes.  Eliana and I have been on a pancake fix so I made this last week and we loved them :)
Valentine's Day is on Tuesday and having an open heart is a beautiful thing.  I think it is important to celebrate love. Love of your family, your spouse, girlfriend, boyfriend, children.  I don't think it should only be celebrated on one day, so for that reason I'm not that big into the hype of Valentine's Day... However I most certainly LOVE my flowers and chocolate covered strawberries I got this weekend (thank you babe!). David and I almost never celebrate holidays on the exact day.  We are actually quite awful at keeping surprises and we usually do gifts whenever we get them, instead of hiding them until a specific day :)  And honestly, we celebrate the idea of Valentine's Day all year long! There is no need to get flowers only on the exact day of February 14!  Anyways we can't celebrate on the actual day.  My Tuesdays consists of going to my graduate internship and then attending night class until 9 pm. So instead we celebrate all year long.  I'll take that instead ;)

For those of you nay-sayers and those who hate the idea of Valentine's Day, or aren't feeling the "love" of this fun holiday these pancakes can be easily transformed into Empty Heart Pancakes. So there. I aim to please ;)

To make these Open (or Empty) Heart Pancakes make your pancake batter.  Use boxed pancake mix, or makes yours from scratch, whichever you prefer.  Make sure to mix it well so there are no lumps.  I then separated the batter into two different colors: pink (few drops of red food coloring) and "white" (uncolored batter). Pour the batters into separate squeeze bottles.

On a skillet or griddle (on low heat) take the pink batter and draw the inner heart and the outer heart.  Let that sit for a little until almost fully cooked.  Then fill in the pancake between the hearts with the uncolored batter.  Leave the inner heart unfilled (or empty, or open.. ).  Let the entire pancake almost fully cook.  Then gently flip the pancake over and let the other side cook.

You could easily do other colors/designs.  What a fun way to celebrate Valentine's Day everyday!

Rabu, 08 Februari 2012

Heart Pancakes

So this week has been exciting for Creative Food! I first made a Facebook Page to share my creations on Facebook so please come visit the page and "like" it to show support!  I also added a new feature to the blog: on the right side you will now see a box where you can enter your email and subscribe to this blog.  Then you'll receive creative food ideas straight to your email! How fun! I hope you enjoy these new features :) So onto even more important things.. like food :)

Sometimes when you are 3 years old all you want to eat is pancakes for lunch. I figured why not make the pancakes extra special and make them into hearts:
To make this cute Valentine's Day pancake platter you will need to make the pancake batter first.  You can use boxed pancake mix, or make yours from scratch. Either way you just need to mix it very well so there are no lumps. I then separated my batter into three different bowls for the three different colors.  I put red food coloring in one bowl, red and blue (to make purple) in the other bowl and left the leftover batter uncolored. I then poured the batter into three different squeeze bottles.

On the skillet I drew outline of the heart first.  I let that cook until it was almost fully cooked.  Then I filled in the heart with the rest of the same color batter.  I let it cook until almost fully cooked. Then gently flip the entire pancake over and let the other side cook.

I then cut out sausages with a small heart cookie cutter I have.


Of course you could be more adventurous and add more colors, or more designs but I really liked the simplicity of just the colored heart pancake.  If you don't want to go through all the pouring of batter into squeeze bottles and drawing out the heart on the skillet you could just add some food coloring to your pancakes, make regular pancakes and then use heart shaped cookie cutters to cut them out. That is much easier and just as cute!...come to think about it.. maybe I should do that next time :)

Linking up here :)

Jumat, 03 Februari 2012

Conversation Heart Lunch

Whenever I think about Valentine's Day candy my mind automatically goes to Conversation Hearts.. I honestly don't like to eat them, but I still find them to be pretty! I decided it was a good year to introduce Eliana to this timeless Valentine's Day classic candy with this lunch:
 
The sandwich is bread, cheese and ham cut into a heart shape with the cheese placed on the top. I cut the letters and heart out of fruit leather.


The four hearts surrounding the sandwich are layered apple, fruit leather and conversation heart candies.


This lunch was so easy to do and Eliana loved it! She also loved the conversation heart candies, although I shouldn't be too surprised.  I thought she would agree with me that they taste like nothing but then again, it is candy and who at almost 4 years old doesn't like candy?! :)


Until Next Time... :)

Linking up here :)
Also linking up to the Valentine's Day Traditions Linky :)

Rabu, 01 Februari 2012

Hearty Lunch

Happy February 1st! Being that Valentines Day is right around the corner I made this cute lunch for Eliana:
 
First I made Eliana a grilled ham and cheese sandwich which I cut into a heart shape with my new heart shaped sandwich press (thank you mom!)  Then I used two small heart cookie cutters and cut out red bell pepper hearts, apple hearts and fruit leather hearts.


This was a very simple lunch to do and Eliana loved it :) 
Definitely a cute and easy lunch to make for Valentine's Day for the kiddos :)

More Valentine's Day Creative Fun Food (click on picture for more detail):