Rabu, 17 Oktober 2012

Halloween Bug Lunch


This lunch is brought to you by the number 8
As in 8 legs. More specifically: the fact that a spider has 8 legs. Not 6.

I had been struggling with ideas of what to make for a lunch...and then finally it came to me. I'll make a spider lunch!! Only to realize hours later (after it had been eaten) that my "spider" only had 6 legs. And to be honest it wasn't me that even realized that.. My husband pointed it out.  I mean the thought had never crossed my mind to count legs! I just stuck some pretzel sticks in her sandwich and called it a spider! Spider. Bug. Who is counting legs anyways?! (well my husband and my daughter for sure..but other than them who is counting legs!!).... soooo this is a BUG lunch or The spider who lost two legs.?! Either way I apparently now need to make a proper spider lunch sometime in the near future :)

To make this simple spider/bug lunch I made a chocolate soynut butter sandwich. I cut the oval using my circle cookie cutter. I put some extra chocolate soynut butter on top and used pretzel sticks as legs. (Be sure to use 8 if you want it to be a spider! lol) I added some candy eyes and a carrot mouth. I added some flowers on the side made of carrots and celery.  And I added some cute raisin bugs too!
Raisin Spiders Bugs. Super cute. Super easy to make. I took an uncooked spaghetti noodle and colored it with my black edible food marker. I used scissors to cut the "legs" (you could easily break it though). I stuck the bug legs into the raisin and called it day. Eliana loved them!

So head on over to the next blog (and the next, and the next) for some awesome Halloween themed food ideas! Click on the pumpkin to hop on over to Laura of El Lunch de mi Enano! [perfect way to practice that Spanish you took in high school..or just use the translator button ;)]

What I used to make this lunch:

I link up.

Jumat, 12 Oktober 2012

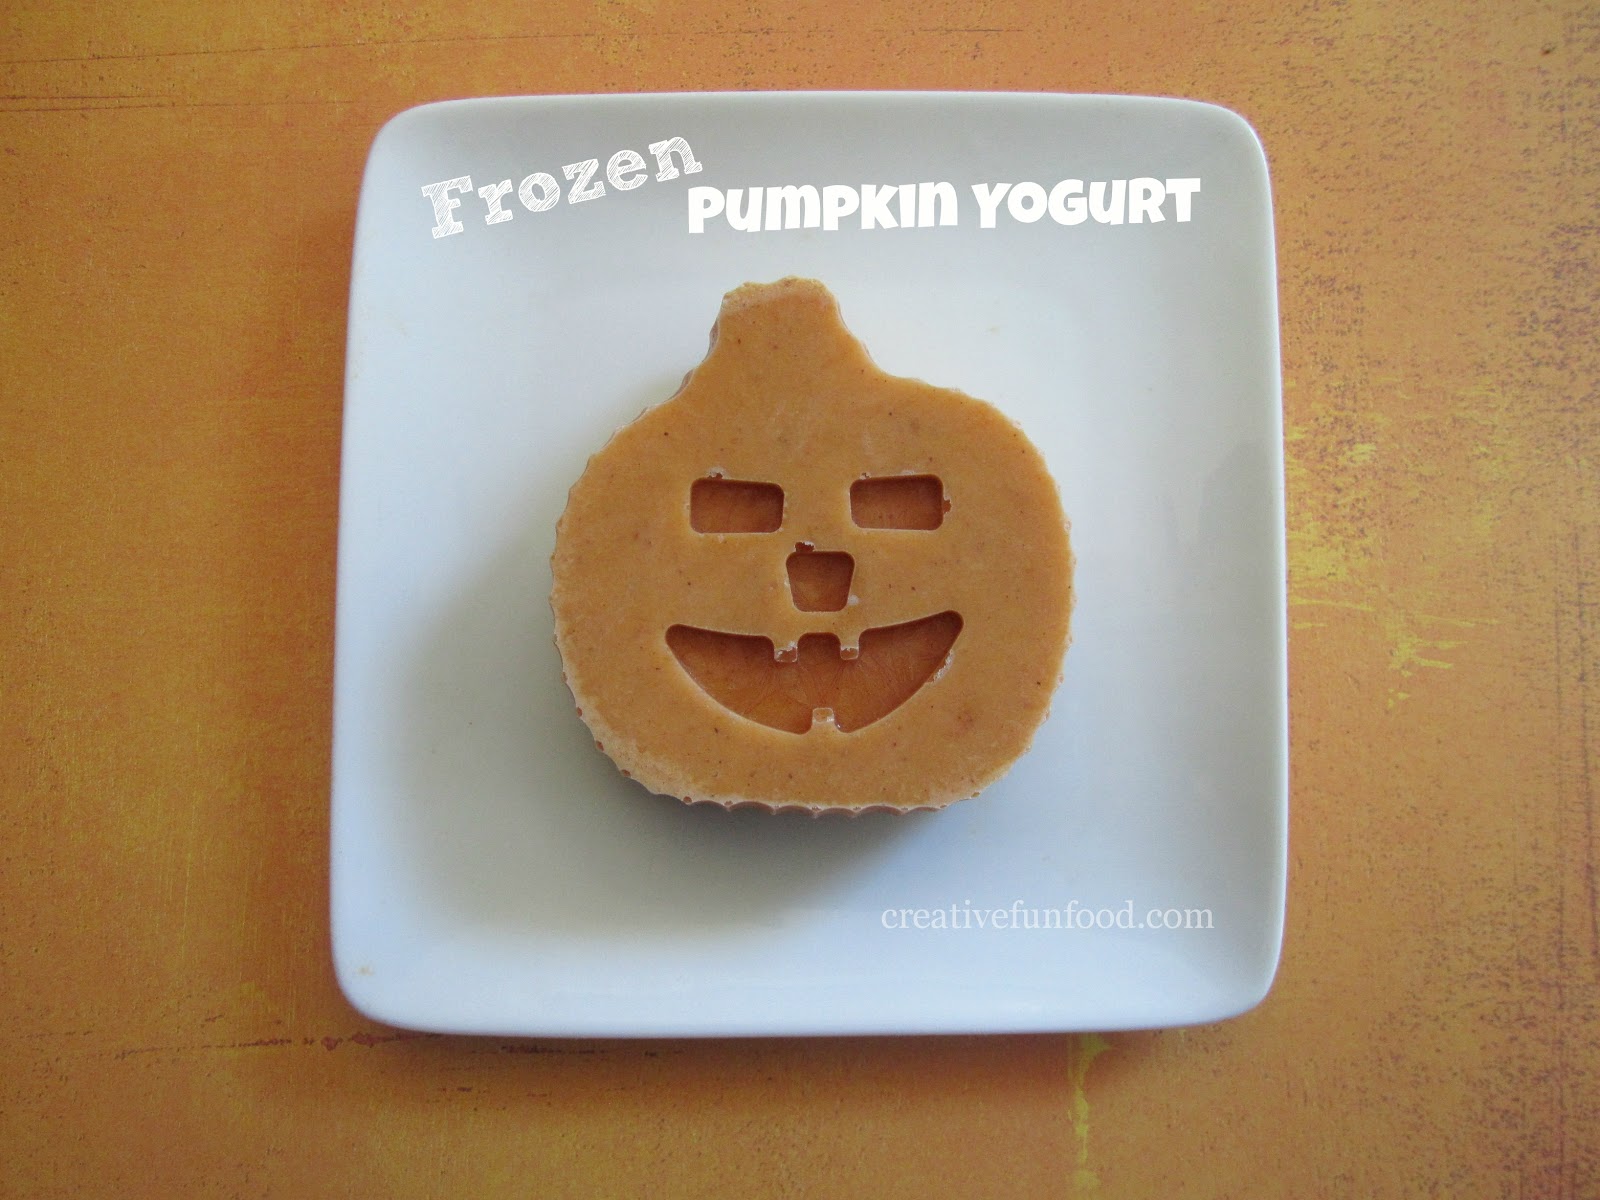
Frozen Pumpkin Yogurt Recipe and Tutorial

A few weeks ago Eliana and made a few batches of different pumpkin cookies, pumpkin bread, pumpkin muffins and pumpkin waffles (pumpkin overload! we love pumpkin!) and we had half a can of pumpkin left.  And even though I love to bake I was not going to make more cookies (at least not for another week or so lol)
So we made pumpkin yogurt. And then froze it. Into mini pumpkin shapes!
I mentioned in my post earlier this week that I was introduced to the idea of freezing yogurt into shapes by Keeley McGuire and Bent On Better Lunches this past summer. Ever since then we have kept frozen yogurt shapes in all different flavors in our freezer.  When it was hot Eliana loved to have them straight from the freezer as a snack.  She also loves to have them on top of some yogurt vanilla so she can "crunch" and "mush" them together.

To make your own Frozen Pumpkin Yogurt you'll first need to get your ingredients together.
Mix these ingredients well and fill a silicone ice cube tray. You may need to do a few rounds of freezing if you only have one ice cube tray. We decided to use this pumpkin silicone ice cube tray we found at the dollar store.
After freezing gently pop out your yogurt and it should look something like this:
You can use silicone baking cups to freeze your yogurt too. They would fit perfect into a lunchbox as well and would defrost by lunchtime. We used pumpkin silicone cups we found at Christmas Tree Shops.
After your pumpkin yogurt is frozen pop them out of the mold and place into a freezer bag or container and keep in your freezer. Take them out when needed. Or put them in your lunchbox. Simple as that! Who knew frozen yogurt shapes were that easy! :)

Frozen Pumpkin Yogurt
Ingredients:*
1/2 can of pumpkin (about 7 oz)**
1 cup of vanilla yogurt
2 tsp of ground cinnamon
1/4 tsp ground ginger
1/4 tsp nutmeg
1/4 tsp ground cloves (optional)
1 tsp of sugar (optional)

Instructions:
Mix all ingredients together. 


...and voila! that is it! You can eat it now or freeze it. We prefer the latter.

To Freeze:
*pour pumpkin yogurt into pumpkin silicone ice cube tray (or regular ice cube tray, or another shaped silicone ice cube tray)
*freeze for a few hours.
*once pumpkin yogurt is frozen you can remove them from the tray and place in a freezer bag or freezer container.
*pop a frozen pumpkin yogurt in a lunchbox or eat for a snack!

*The ingredients are estimated, and are completely flexible! Everything is optional and should be made to your taste preferences! Put more pumpkin, or more yogurt, or better yet more cinnamon (you can never have too much cinnamon!) We started off with small amounts and I let Eliana be the taste tester. She asked for more cinnamon and so I added more cinnamon in small increments until she said it was good. I would encourage you to have your kid be your taste tester too!
**Depending on which brand of pumpkin you use your frozen pumpkin can look orange, or more of a muted orange. Either way works but we prefer Libby's Pumpkin (what we used in these pictures).

What I used to make this snack (or similar):

I link up.

Rabu, 10 Oktober 2012

I.M. Healthy Peanut Free and Nut Free Granola Review and Giveaway!

Looking for a peanut free and tree nut free granola? This new line of granola by I.M. Healthy will be perfect for you whether you have a food allergy in the home, or if your children go to strictly nutfree schools!
It is so difficult to find peanut free and nut free granola.  Believe me. I know. Most granolas either have peanuts and/or nuts in them or have traces of them.  Thankfully companies like I.M. Healthy have dedicated peanut and tree nut free facilities.  This assurance is a necessity when you have a child with an allergy.

So we got to try out I.M. Healthy's new line of granola and let me tell you: We love it!  It is perfect on top of yogurt, with fruit, or mixed in with cereal or in a trail mix-- you name it. You can use it everywhere you use regular granola, but you get the assurance of it being peanut free and nut free. High in fiber, protein, and yummyness.

Make an easy Halloween Snack:
I put some vanilla yogurt in our pumpkin silicone cups and topped it with the granola for a snack. This would be a great addition to any lunch too!  I chose to use these pumpkin silicone cups because it is pumpkin season (and we love all things pumpkin) but you can easily use any silicone cup. You can also keep the granola separate from the yogurt so that it doesn't get soggy while sitting in the lunchbox all day.  We love to use our mini dippers. By keeping the granola in a separate container it can easily be poured on top of the yogurt during lunchtime:)


Trust me. Your kids will be begging for treats instead of tricks! 
Healthy Halloween Treats that is.
We decided to add some fun to our granola! In the top pumpkin I added some mini leaf sprinkles to our granola  A few sprinkles go a long way. By just adding a few sprinkles you can turn ordinary granola into fun food. In the bottom left I added some Jack-o-Lantern Sprinkles.  In the bottom right I added a few Sixlets.

And now.. onto my little pumpkin thief...
This is what happens when you are taking pictures of your granola around your 4 year old... She takes one. And replaces it with a craft pumpkin (which she made). Smart kid ;)

Right now you can only buy the granola on their website, but it will soon be on amazon. Wouldn't you like to try some of this yummy granola? Well today might be your lucky day. One lucky person will win a dozen packets of I.M. Healthy's granola! The winner will receive six packets of plain granola and six packets of fruit granola. Twelve packets of goodness. Enter below for a chance to win! **This giveaway is now closed**
a Rafflecopter giveaway

This giveaway closes October 17th at 12:01 am EST. Open to shipping addresses only in the U.S. The winner will be randomly selected through the rafflecopter and announced that same day.  The winner will receive an email notifying them of their win.  The winner will have 48 hours to respond to the email to claim their prize or they will forfeit their prize and another winner will be selected.

*This giveaway is now closed but I.M. Healthy has given Creative Food readers a special promo code to try out some products with FREE shipping from their shop! With the promo code CFB1 all the items below are reduced by $5.00 and you get FREE shipping! Code is active until November 16, 2012.

Items included in the promo code:
Original Creamy SoyNut Butter (code reduces price from $17 to $12)
Two Jar Combo Pack of SoyNut Butter (code reduces price from $17 to $12)
Individual sample size cups of Creamy SoyNut Butter (code reduces price from $27 to $22)
Individual sample size cups of Chocolate SoyNut Butter (code reduces price from $27 to $22)
Plain Granola (code reduces price from $25 to $20)
Fruit Granola (code reduces price from $25 to $20)


*Disclaimer: I received this product from I.M. Healthy but it was my decision to write up a review. It was also my idea to do the giveaway, which I.M. Healthy kindly agreed to. All opinions stated are my own*

Senin, 08 Oktober 2012

Jack-o-lantern Bento

We made it to the orchard this weekend but failed to pick a pumpkin (it started to rain)... So with no actual pumpkins in the house yet we decided to put pumpkins in our lunch!
This was such a simple lunch to put together! In the main compartment of our EasyLunchboxesEliana had a ham and cheese sandwich on a sun dried basil tortilla, cut with a pumpkin cookie cutter. We went a long with our Pumpkin Patch Lunch theme and put some sliced green peppers and snapea crisps surrounding the sandwich.  To make your Jack-o-lantern you can use some edible food markers and draw a face. 

In the top right Eliana had some yogurt.  I saw the brilliant idea of freezing yogurt into shapes on Keeley McGuire and on Bent On Better Lunches this past summer and we've been doing it ever since. We always have some in our freezer stash now. Eliana had a frozen pumpkin yogurt on top of vanilla yogurt (recipe and tutorial here!)

In the bottom right Eliana had a pumpkin cinnamon streusel muffin. This is one of our favorite muffins! Both Eliana and I love muffins and pumpkin and cinnamon. Put them together? deliciousness. So of course we made extra and put them in the freezer to savor them longer ;) I already like to make my muffins in silicone cups. It not only reduces waste (you throw out the paper liner all the time!) it also makes makes the muffin cuter. Anything looks cutter in a silicone cup :)

But somehow I feel like this lunch is missing something.... it doesn't seem Jack-o-lantern-y enough...
aha! Now it is a Jack-o-lantern bento! :) I know, I know... I'm so silly. I simply love these pumpkin silicone cups. I found them at Christmas Tree Shops. They have a face in the bottom, so when you turn your muffin around it is a Jack-o-lantern! It was such a simple way to make this lunch more fun :)

Here is what I used to make this lunch (or similar):

I link up.

Jumat, 05 Oktober 2012

Pumpkin Patch Lunch

Heading to the pumpkin patch to pick a pumpkin? We made this simple lunch to celebrate some pumpkin picking -- which we hopefully we will be doing this weekend!
This lunch would be perfect after a day at the pumpkin patch! And it is so simple to make. We will definitely be making this lunch again :)

The big pumpkin is a ham and cheese quesadilla cut with a pumpkin cookie cutterThe tiny pumpkins are also ham and cheese quesadillas cut with a mini pumpkin cookie cutter. You can draw the details on with edible food markers.  I had made one large quesadilla with a sun dried basil tortilla.  I cut out the shapes for Eliana's lunch, and the rest was for me in addition to my salad :)

The pumpkin patch is made up of cut green peppers and Snapea Crisps.

We actually haven't picked or carved pumpkins in a looong time! Eliana wants to do that this year and so do I! Since I am not skillful in that way at all, we'll need to rely on the artistic ability of David :) Or we could just decorate them on the outside.. OR a little bit of both! :) 

When we went apple picking in September there were a million pumpkins out at the orchard. But for some reason I felt it was too early (and perhaps too hot-- it was over 70 degrees that day!) for pumpkins. So we didn't pick one that day. Hopefully we have some nice weather this weekend and can pick a few pumpkins! 


Here is a picture of Eliana when we went to the orchard in September:
Happy Pumpkin Picking!


Rabu, 03 Oktober 2012

Special Announcement!

I am sooooooo excited to announce that I am going to be a part of the MOMables team! You can now find me at MOMables as a contributing blogger!
What is MOMables? Simply put: Mom made, simple, easy and nutritious fresh school lunches made in 10 minutes or less. For just $0.22 cents a day! Each Friday paid subscribers receive a new weekly menu plan including a shopping list! It is so easy to use and it is very easy to adjust the meals to accommodate food allergies if necessary.  Here is an example of what you would have access to as a paying subscriber:
Every week you have access to awesome lunches that are quick and easy to make. Each lunch has your ingredients, directions, tips if necessary, and a picture. That is right. A picture of every single lunch. I am so visual so I LOVE that part! I also love how a shopping list is included so you don't have to think about what ingredients you need. Just print it out and go shopping! Here is a sample menu. Of course you'll hear more about MOMables in the weeks to come! :)

My posts on MOMables will be different than my posts here.  I will still be writing about creative food, but more about how to be creative with your food and incorporate more vegetables into recipes and such. I will save my creative fun lunches for here :)  I had guest blogged earlier this year with my Carrot Zucchini Bars. Seriously the most perfect desert bar that your kids WILL enjoy and they are packed with vegetables!

I am so honored to be a part of a wonderful team.  MOMables is all about making healthy lunches for your children.  And that is exactly what I try to do for Eliana, of course with a creative twist :)


So go head on over to MOMables and check out my first official contributing post!!!
*squeal*

So remember to stop by at MOMables and check it out! Or better yet, sign up for a week of MOMables and a FREE newsletter and you'll get awesome posts sent to your email!

I may sound like a broken record: but SQUEEEEEEEEEE! So excited! :)

Senin, 01 Oktober 2012

A Bug's Life Lunch Part Four

This is A Bug's Life Lunch Part Four: Bento style :) 
A bento is basically food in a box. And this bento box is a favorite of ours :) They are smaller but they are the perfect size for Eliana, who doesn't always eat the biggest lunches.  They are two tiered, stack easily and an elastic bento strap holds it all together.  I've been using them for months now and I'm finally getting a picture up of them on the blog! Eliana loves that she can open everything herself without any help.

So continuing with our Back To Nature Crazy Bugs Macaroni & Cheese we made another lunch :)

In the bottom tier (top in the picture) Eliana has her Crazy Bugs Macaroni & Cheese in a Flower Silicone Cup.  Beside the cup are some frozen peas (will defrost by lunchtime) and rolled ham skewered on some cute bug bento picks.

In the top tier (bottom of the picture) she has sliced strawberries with two more cute bug bento picks.  The white lid makes the top tier leak proof from our experience. I've put yogurt and applesauce in that tier and never had a leak :)


Don't these A Bug's Life Lunches make you think of spring?! With this *freezing* weather lately (and by freezing I mean in the 50s and 60s) I was happy that we made some warm spring time lunches :) 


(Check out A Bug's Life Lunch Part One, Part Two, and Part Three)


**Stay tuned for A Bug's Life Lunch Part Five!**

Here is what I used to make this lunch: